Saturday, September 29, 2012

Creative Paperclay® Candy Dish


I have got to say that this project was a lot of fun and very interesting to do. I grow a lot of plants and flowers and I have a hosta (actually several hostas now) that I’m particularly fond of. Well the other day I had the thought of using a hosta leaf as a pattern/mold for a candy dish. Here’s what I started with:

2003-02-12 13.07.52 Aren’t those leaves beautiful? There were many that were bigger but I wasn’t trying to make a plate, just a candy dish. lol  It took almost the whole 1 lb. package of clay to make the dish. I first rolled the clay out and then pressed the back of the leaf into the clay. I bent the clay while it was wet and put some crumpled up fabric under it to hold it up while it dried. 2003-02-12 14.11.48After the clay had set for a day, I turned the clay over and removed the leaf from it. The clay was still damp and the leaf pulled right off it. I then let the clay sit until it was completely dry. Once the leaf was completely dry I painted it with “Silks” Acrylic Glaze from Luminarte.2003-02-14 12.57.14 Once the paint was dry on both sides I coated both sides several times with Minwax waterbased Polyurethane. This is the final result:

2003-02-15 11.58.04           2003-02-14 15.51.43

This candy dish turned out pretty nice didn’t it? Quite the coffee table addition!     2003-02-14 16.49.582003-02-14 16.50.40I hope this inspires you to try using Creative Paperclay®. It’s a great clay to work with and you can make so many different things with it. Thinking Christmas anyone?

Barbara

Friday, September 28, 2012

Amazing Mold Putty and Creative Paperclay® Blog Hop!


Creative Paperclay and Amazing Mold Putty

Hello everyone! I hope you all have a great time with the blog hop today! I’m really anxious to show you what created. I have never decorated a skull mask before but right after Halloween last year I purchased a paper mache’ skull at Michaels for a great price and have kept it all this time. Just in case I decided I wanted to make more than one skull, I decided to make a mold out of the one I had. With Halloween coming up look at what I made! Here’s what I started out with:2003-02-09 13.24.03I had already gessoed and sealed the outside of the mask. I then mixed equal parts of A and B mold putty and applied it to the mask to create a mold. I did have to make several batches to cover the whole mask.2003-02-09 13.50.15 Once the mold had set up I used Creative Paperclay® which I had first rolled out, to line the inside of the mold. I made sure the clay was pressed firmly into the mold and then set the mold and clay up to harden. I did have to hold the sides in as the mold wanted to spread out since it was so large and flexible.2003-02-12 12.34.522003-02-12 14.11.35  Once the clay was halfway dry I turned it out of the mold and let it finish drying. Once dry I started decorating! I coated the mask with gesso and used paint pens to add color and then glued sequins on to give it that bling I so love! Can you see the sparkle that I glued on one of the front teeth? This skull is so awesome! I hope you like it too.2003-02-16 14.37.12 Your next stop on the blog hop will be with Molly so go on over and see what she’s created for you to see. There will be three winners in this giveaway, one winner will be receiving a package of Creative Paperclay one winner will receive one package of Amazing Mold Putty and the third winner will receive one package of Amazing Resin. Woo Hoo! What an outstanding giveaway! Below is a list of the Blog Hop participants in order. Don’t forget to start with Terri Sproul and cast your vote for your favorite project entry at the last stop which should be Amazing Mold Putty. Hope you have lots of fun and I hope you vote for ME! (Whoever gets the most votes gets a prize too!)
Creative Paperclay

Terri sproul - http://www.terrisproul.blogspot.com

Barbara Moore http://barbara-moorewhimsies.blogspot.com/

Molly Walsh http://molly1989-mollysplace.blogspot.com/

Debbie Buckland http://artycrafty.wordpress.com/

Edie Cournoyer http://lifebytheseatofmypants.wordpress.com/

Lyneen Jesse http://dreamingofcastles.blogspot.com/

Lee Brehon http://www.createalways.com/

Annie Courture http://www.cornerofthebedroomstudios.blogspot.com/

Kelly Donovan http://knittingandthings.com/

Michelle Cummings http://faeriedustdreams-michelle.blogspot.com/

Rachel Whetzel http://www.minetothine.com/

Susan Brown http://www.sbartist.blogspot.com/

Ananda Marks http://ajsarts.wordpress.com/

Angie Westerman http://altermyworld.blogspot.ca/

DeeDee Catron: http://umwowstudio.blogspot.com/

Amazing Mold Putty: http://amazingmoldputty.blogspot.com/

Barbara

Thursday, September 27, 2012

Christmas and gifts with Sakura Crystal Lacquer and Terri Sproul Mixers


I’ve been thinking quite a bit about the holidays lately. I decided to try to get a little head start on the little gifts. I started out with the following:

2003-02-15 11.59.45  Can you see the wooden bracelet? Well I mixed up some Crystal Lacquer with the extra fine glitter and Terri Sproul Mixer/ Gold and painted it. I put two coats on it and it came out looking wonderful. I’m glad I have a couple more bracelets that I can paint to give as little gifts!

While I was at it I painted a paper mache’ ornament that I had with the same Gold Mixture that I painted the bracelet with. Here’s a picture of both finished pieces:

2003-02-15 17.17.52                2003-02-15 17.18.18

Doesn’t that Gold and Glitter just look gorgeous? I loved how they turned out, how about you?

Barbara

Thursday, September 13, 2012

A Cute Little ATC with Sakura and Terri Sproul Mixers!


I have been creating quite a few ATC’s for swapping and for leaving as RAA’s (Random Acts of Art). I enjoy creating these cute little 2.5” X 3.5” pieces. ATC stands for Artist Trading Cards and if you’ve never tried them you really need to. I started out with the following:

2003-02-01 15.21.52

To begin with I stamped the flower image onto an ATC card. Then using some pastel Crystal lacquer, I mixed some TS mixer Green Shimmer into it and painted my stem and leaves. Following that I painted some Red Shimmer mixed with Crystal lacquer that is rather on the pink side because I didn’t mix much red in and painted the flower petals. The center of the flower is a pastel pink Crystal lacquer and the surrounding ATC is painted in a pastel blue Crystal lacquer.

2003-02-01 15.51.26     2003-02-01 15.52.20 Don’t you think this is pretty? Plus your card is protected with the Crystal Lacquer. I think all it needs is some wording to the right of the flower don’t you? Your comments are all read and appreciated by me.

Barbara

Friday, August 31, 2012

Amazing Mold Putty Pendant


Recently I was given the bowl part of a sugar spoon and had intended making it into a pendant. I was looking at it today and decided to see if I could come up with a mold for it and use resin to make the pendant.

Here’s what I started with:

                   2003-01-19 11.14.04        2003-01-19 11.14.14 I loved the design on this spoon so……..I mixed up equal amounts of Part A and Part B of the Mold Putty. You need to get it mixed thoroughly and then I pressed my spoon into it to create the mold. I pressed the spoon in one way and then wasn’t sure how that would work, so once it set up I mixed up more putty and pressed the spoon in the other direction.

                 2003-01-19 11.18.20        2003-01-19 11.18.09   As soon as I had my molds made I mixed up some Amazing Casting Resin, (equal amounts of Part A and Part B) and poured it into the molds. Once it set up I decided that the one that had the cup to it would be perfect for the pendant. 2003-01-19 13.02.08 I know it’s kind of hard to see the design on the resin but it’s there. I then smoothed out the edges and first painted the resin piece with silver paint and then rubbed black paint into the crevises. Once the paint was dry I glued a piece of sea glass on the piece  and embedded some seed beads into some Crystal Lacquer in a random pattern around the glass. I then attached a bail  and here’s the finished product: 2003-01-19 15.18.04 The Crystal Lacquer isn’t quite dry here but look at the pendant next to the original spoon:  2003-01-19 15.18.35  Isn’t that awesome the way that it turned out? I was amazed at how close to the original the pendant looked. I’m a happy camper over this one! I would love to here what you think of it. Please leave a comment or two!

Barbara

Tuesday, August 28, 2012

Making a thin gourd wonderful with Creative Paperclay®


My project this time transformed a very thin ugly little gourd into a beautiful bowl. I had this gourd for quite some time because when I cut it open and cleaned it the gourd was super thin. I set it aside rather than work with it. I was looking for something else the other day and came across this gourd and had the bright idea that I could save it and transform it with some Creative Paperclay®.

2003-01-14 16.34.09        2003-01-14 16.34.20

Not very pretty is it? I don’t know if you can see how thin it is but take my word for it. The first thing I did was cover the gourd with Creative Paperclay®.

2003-01-14 17.49.37        2003-01-14 17.49.49

Once the paperclay was applied to the gourd, I first let it completely dry and then sanded it smooth by hand. I then painted the inside of the gourd black. On the outside I mixed up some Sakura Crystal Lacquer and Terri Sproul Mixers, Tanzanite Blue Shimmer and Green Shimmer and painted it on the gourd. When that was finished and dry, I added some mosaic black tiles and voila’ look what we have now!

              2003-01-16 15.51.07                          2003-01-16 15.50.56

So here you see the finished project, this gourd is really beautiful. Can you see the shimmer on it? I love the look of that shimmer and I love this color. Look at the before and then look at the after. Wow, quite a difference isn’t it? Creative Paperclay® is a great paperclay to work with and I’ve been using it for quite a long time. You need to try it too!


Barbara

Sunday, August 26, 2012

Quick Tip For working with Creative Paperclay®


Whenever you work with Creative Paperclay® use something else to build your base whenever possible. This way you will reduce the amount of clay that you use. You can make your clay go twice as far and still create some beautiful pieces. Your clay will also dry much faster. There are so many things that you can use to create a base on which to mold your clay, aluminum foil, wire, styrofoam, wooden dowels and even gourds, just to name a few. So the next time you start to create a piece made out of Creative Paperclay® make a rough base or body of the piece to be made and add your clay to that. You’ll be glad that you did.

Barbara

Thursday, August 23, 2012

Gourd work and Sakura Crystal Lacquer and Terri Sproul Mixers!


It’s been a little while since I’ve posted some of my Gourd Art that I’ve used Sakura Lacquer and the TS Mixers on. Well this gourd is a new one. To begin with the gourd has to be scrubbed on the outside, cut open and cleaned on the inside. I chose to make a bowl out of this particular gourd and I wanted to make it unique of course. In the first picture I’ve already carved out a circular spot and painted it with gold TS Mixers and Sakura Lacquer. Once that was done I used “Thick” Sakura Crystal Lacquer and put a thin layer in the same spot and added seed beads on it and when that had set I filled in the area with the “Thick” Crystal Lacquer. I know you’ve probably not heard about the “Thick” Lacquer from Sakura and that’s probably because it is new. I contacted Hiro Sakura some time back when I was placing an order and told him that I needed something thicker than the regular Crystal Lacquer because a gourd has a curved surface and the regular lacquer ran too quickly for what I was wanting to try. He sent me some and I’ve got to say “I love it!” The Terri Sproul Mixers can be mixed with both Lacquers and we know how good that looks!

2003-01-10 14.51.42    2003-01-10 14.51.53

Here’s  a couple of pictures of the gourd after I had ground out the lizards. See the gold circle in the middle?

2003-01-10 15.24.12    2003-01-10 15.24.56

These are the lizards after they were ground out and then painted with the Sakura Crystal Lacquer and the Terri Sproul Mixers

2003-01-10 15.49.13    2003-01-10 15.49.25

These pictures show the lizards with the beads and “Thick” Crystal Lacquer.

2003-01-11 19.28.17    2003-01-10 19.40.01

These pictures show the lizards with the Lacquer dry.

2003-01-11 19.28.04

This is a shot of the bowl with the lizards and the circle finished. The gourd is finished but I’m not sure if I will add anything else. How do you like it? These products are the bomb!! There are several places that you can buy these products at but Sakura Hobby Craft carries them all!

Barbara

Thursday, August 9, 2012

A New Piece of Jewelry made with Sakura Crystal Lacquer


Hello there everyone! I wanted to share a necklace that I made using a blank bezel, some ephemera and Sakura Crystal Lacquer. I started out with the following:


IMG_1281

Once I had picked all of the pieces that I wanted to put together, I first used a bit of the Crystal Lacquer to hold my bottom piece down and then used the Crystal Lacquer to add all the other components of the necklace to the bezel. Once everything was attached, I filled the bezel up the rest of the way with Crystal Lacquer and I love how it looks!

IMG_1286

The Crystal Lacquer dries clear and you don’t have to worry about a lot of bubbles and if you get one it’s very easily gotten rid of. I think this one is going to be a gift for a granddaughter. Of course I’ll have to make several more, so that no one gets jealous!lol

Barbara

Tuesday, July 31, 2012

A Mask Mold made with Amazing Mold Putty!


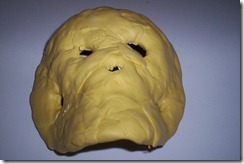
I’m always looking for new things whenever I go into Hobby Lobby or Michaels and sometime ago I found a plastic mask that could be decorated.2004-01-09 10.56.02 Well this was definitely something that I didn’t want to lose the first time I decorated it! So I thought it would be the perfect thing to make a mold out of. So with my trusty Amazing Mold Putty Part A and Part B (equal parts of each) I molded the mask:       2004-01-09 10.55.32            

 2004-01-09 11.02.55                   2004-01-09 11.03.16

Once I had the mold made I filled it with Creative Paperclay® and let it dry. It took a couple of days for the clay to dry completely but it was worth the wait.2004-01-09 11.10.22  It may be hard to tell but the Paperclay mask is the one on the left. (I think lol) Once dry I used Sakura 3D Crystal Lacquer and Tanzanite Shimmer Terri Sproul Mixer to paint the outside of the mask. I did put more than one coat on and here’s what it looked like: 2004-01-09 13.06.25  You wouldn’t believe how shiny and shimmery it looked! I then added some embellishments and voila’! 2004-01-09 13.37.31 Aren’t those feathers just to die for? Here’s another look:2004-01-09 13.38.04 I’ve got to tell you I was extremely happy with the way this looked and now that I’ve added a hanger to the back it will look very pretty hung on a wall. Yay for Amazing Mold Putty! Now I can make another and another and another………….Don’t forget that you can purchase the Amazing Mold Putty, Amazing Casting Resin and Clear Cast Resin for 20% off until the end of September! Use AMP20 for your coupon code when you order and make sure you order! These products really are AMAZING!

Barbara

Monday, July 30, 2012

Decorating a Photo Frame with Creative Paperclay® Embellishments!


I wanted to do something a bit different for my Paperclay project today so I got out a couple of molds and started molding stuff. Whenever I make something with a mold and Paperclay, I usually make several. When they’re all dry I put the ones which I’m not going to use back for use at another time. You can make something quick that way and not have to wait for the clay to dry.

2004-01-08 10.41.55

I needed a few butterflies for my project, so I used six of these and stored the rest along with the other things that I molded today, to be used in the future.

2004-01-08 11.36.10   Here’s the frame that I used. I painted it with Sakura 3D Crystal Lacquer mixed with Terri Sproul Mixer, Shimmer green.

2004-01-08 13.41.37 Isn’t this color awesome? Plus my frame is now sealed and protected. I then worked on painting the butterflies and when they were dry I glued them unto the front of the frame. I glued a beaded leaf down first though.                                                       2004-01-08 17.00.12                2004-01-08 17.02.24 

I thought this was a nice Summertime project and will look good with a Summer picture in it.


Barbara